Code example
These code snippets walk you through a small stitching workflow consisting of
- Preparing the input image data and metadata (tile positions, spacing, channels)
- Registering the tiles
- Stitching / fusing the tiles
Make sure to also check out the example notebooks. in the notebooks/ directory.
Note that the code snippets are minimal examples and the tile boundaries shown in the visualizations contain random image data.
1) Prepare data for stitching
import numpy as np
from multiview_stitcher import msi_utils
from multiview_stitcher import spatial_image_utils as si_utils
# input data (can be any numpy compatible array: numpy, dask, cupy, etc.)
tile_arrays = [np.random.randint(0, 100, (2, 10, 100, 100)) for _ in range(3)]
# indicate the tile offsets and spacing
tile_translations = [
{"z": 2.5, "y": -10, "x": 30},
{"z": 2.5, "y": 30, "x": 10},
{"z": 2.5, "y": 30, "x": 50},
]
spacing = {"z": 2, "y": 0.5, "x": 0.5}
channels = ["DAPI", "GFP"]
# build input for stitching
msims = []
for tile_array, tile_translation in zip(tile_arrays, tile_translations):
sim = si_utils.get_sim_from_array(
tile_array,
dims=["c", "z", "y", "x"],
scale=spacing,
translation=tile_translation,
# affine=None, # (e.g. for rotated or sheared tiles)
transform_key="stage_metadata",
c_coords=channels,
)
msims.append(msi_utils.get_msim_from_sim(sim, scale_factors=[]))
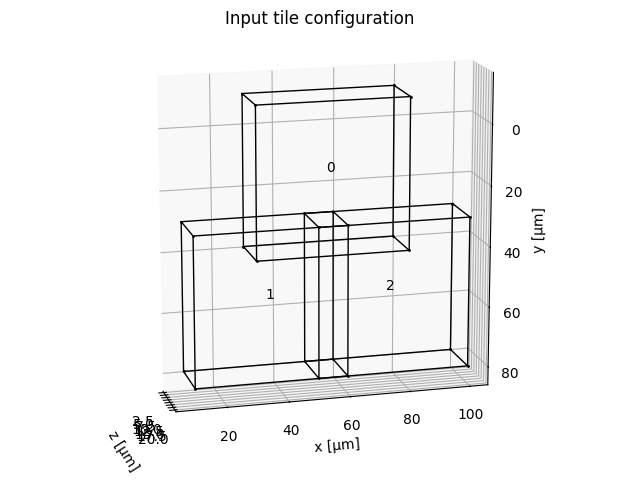
# plot the tile configuration
# from multiview_stitcher import vis_utils
# fig, ax = vis_utils.plot_positions(msims, transform_key='stage_metadata', use_positional_colors=False)
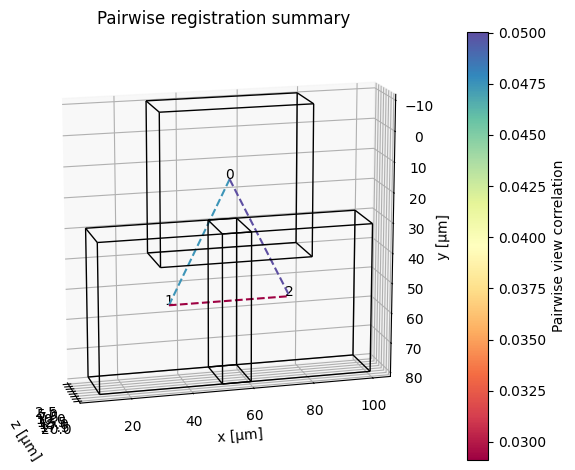
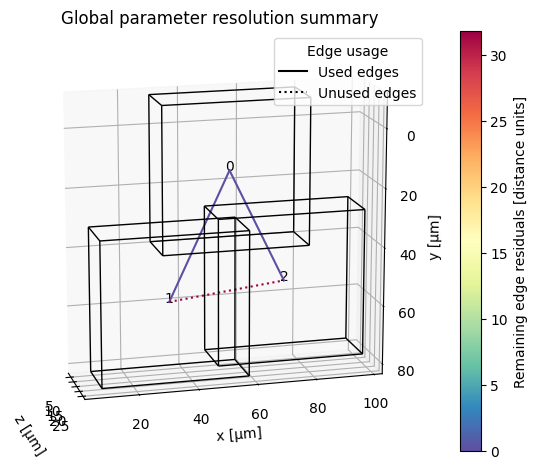
2) Register the tiles
from dask.diagnostics import ProgressBar
from multiview_stitcher import registration

with ProgressBar():
    params = registration.register(
        msims,
        reg_channel="DAPI",  # channel to use for registration
        transform_key="stage_metadata",
        new_transform_key="translation_registered",
        pre_registration_pruning_method=None,
        plot_summary=True,
    )
3) Stitch / fuse the tiles
from multiview_stitcher import fusion

fused_msim = fusion.fuse(
    images=msims,
    transform_key="translation_registered",
)

# get fused array at the highest output resolution as a dask array
fused_msim["scale0/image"].data

# get fused array at the highest output resolution as a numpy array
fused_msim["scale0/image"].data.compute()
Because the input is a list of MultiscaleSpatialImage objects, lazy fusion returns a fused MultiscaleSpatialImage.
For large datasets (>50GB, potentially with benefits already at >5GB) consider streaming the fused result directly to a zarr file using the following way to call fusion.fuse:
from multiview_stitcher import fusion

fused_sim = fusion.fuse(
    images=msims,
    transform_key="translation_registered",
    # ... further optional args for fusion.fuse
    output_zarr_url="fused_output.ome.zarr",
    zarr_options={
        "ome_zarr": True,
        # "ngff_version": "0.4",  # optional
    },
    # optionally, we can use joblib for parallelization (`pip install joblib` and `from multiview_stitcher import misc_utils`):
    # batch_options={
    #     "batch_func": misc_utils.process_batch_using_joblib,
    #     "n_batch": 20,  # number of chunk fusions to schedule / submit at a time
    #     "batch_func_kwargs": {
    #         'n_jobs': 4  # number of parallel jobs for joblib
    #     },
    # },
)